Obtaining certificates is an essential step in one’s academic journey. For students who have completed their studies at the University of Nigeria, Nsukka (UNN), collecting their certificates is a moment of pride and accomplishment.
UNN has introduced a simplified invoice generation system for certificate collection to streamline this process.
In this article, we will guide you through the steps to generate an invoice for UNN certificate collection, making the process smooth and hassle-free.
Generate Invoice for UNN Certificate Collection

If you are a student at the University of Nigeria, Nsukka (UNN), and you need to collect your certificate, you will need to generate an invoice for the payment process.
Follow these step-by-step guidelines to generate the invoice for your certificate collection easily:
How to generate an invoice for UNN certificate collection
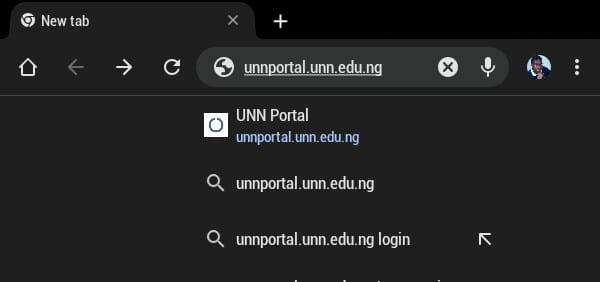
- Visit the UNN Portal on your internet browser
Type in the address bar of your web browser, “unnportal.unn.edu.ng“, and press the “Enter” key on your keyboard. This will take you to the UNN Portal homepage.
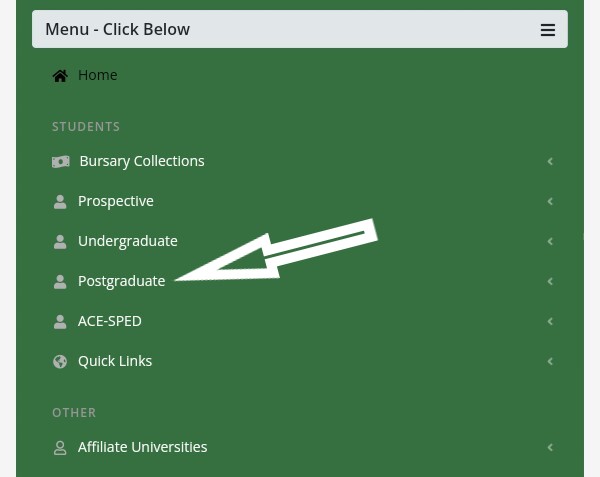
- Navigate to the Bursary Collection Invoice Section
Once on the UNN Portal homepage, look for the section labelled “Prospective Student.” Click on the drop-down button next to it, and a menu will appear.
- Select “Bursary Collection Invoice
From the drop-down menu, find and click on the option labelled “Bursary Collection Invoice.” This action will direct you to the invoice generation page.
- Choose Fee Category
On the invoice generation page, you will see a drop-down button labelled “Select Fee Category.” Click on it to observe the available options in the drop-down list. From this list, choose “Student Related Payment.” This step ensures that you are generating an invoice for a student-related transaction.
- Select Fee Sub Category
After selecting the fee category, proceed to the next step by clicking on the drop-down button labelled “Select Fee Sub Category.” In the drop-down list, locate and choose “Certificate Collection.” This selection specifies the type of payment you are making.
- Choose Certificate Type
Now, click on the drop-down button labelled “Select Type.” From the options displayed in the drop-down menu, select “Undergraduate” if you are an undergraduate student. This step specifies the type of certificate you are collecting.
- Enter Registration Number
In the “Reg. No:” column, type in your unique registration number, which is required for invoice generation. After entering the correct registration number, click on the “Next” button.
- Select Payment Session
The next screen will prompt you to select your preferred payment option.
- Submit and Generate Invoice
After selecting the payment session, click the “Submit” button. The system will process your information and generate the invoice for your certificate collection.
- View and Print the Invoice
Once the invoice is generated, it will be displayed on the screen. Carefully review all the details to ensure they are accurate. The invoice will contain information such as your name, registration number, certificate type, session, and the amount to be paid.
- Print the Invoice
It is essential to have a physical copy of the generated invoice for payment verification. Click on the “Print” button on the invoice page to print a hard copy. Ensure that the printout is clear and legible.
- Make Payment at the Recommended Bank
With the printed invoice in hand, proceed to the recommended bank as indicated on the invoice. The university will have specified certain banks where payments for certificate collection should be made. Present the invoice to the bank teller and inform them that you want to make the payment.
- Receive Bank Confirmation Slip
After processing your payment, the bank will provide you with a bank confirmation slip as proof of payment. This slip will contain important details such as the transaction ID, date of payment, and the amount paid.
- Keep the Bank Confirmation Slip Safely
The bank confirmation slip is a crucial document, so make sure to keep it safe. You may need to present this slip along with other documents when collecting your certificate from the university. Consider making a photocopy or taking a clear picture of the slip as an additional backup.
- Collect Your Certificate
After making the payment and obtaining the bank confirmation slip, follow the university’s procedure for certificate collection. This process may involve visiting the appropriate university department or office designated for certificate issuance. Be sure to carry all necessary documents, including the bank confirmation slip, identification, and any other requirements specified by the university.
Conclusion
Congratulations! You have successfully generated the invoice and completed the payment process for your UNN certificate collection.
Always keep your payment records and related documents safe for future reference, if necessary.
If you encounter any issues or have questions during the process, don’t hesitate to contact the university’s administrative support for assistance.
Let me know if you have any questions or need further clarification. I would love to assist you.
You can watch my videos on the Studentship YouTube Channel by clicking here.
Join my Facebook Group, Like my Facebook Page or Follow Me on WhatsApp for more interactive discussions.


